
Step 1: Fill out your basic business info
Open the following URL to create a business page on Facebook:
https://www.facebook.com/pages/create.php
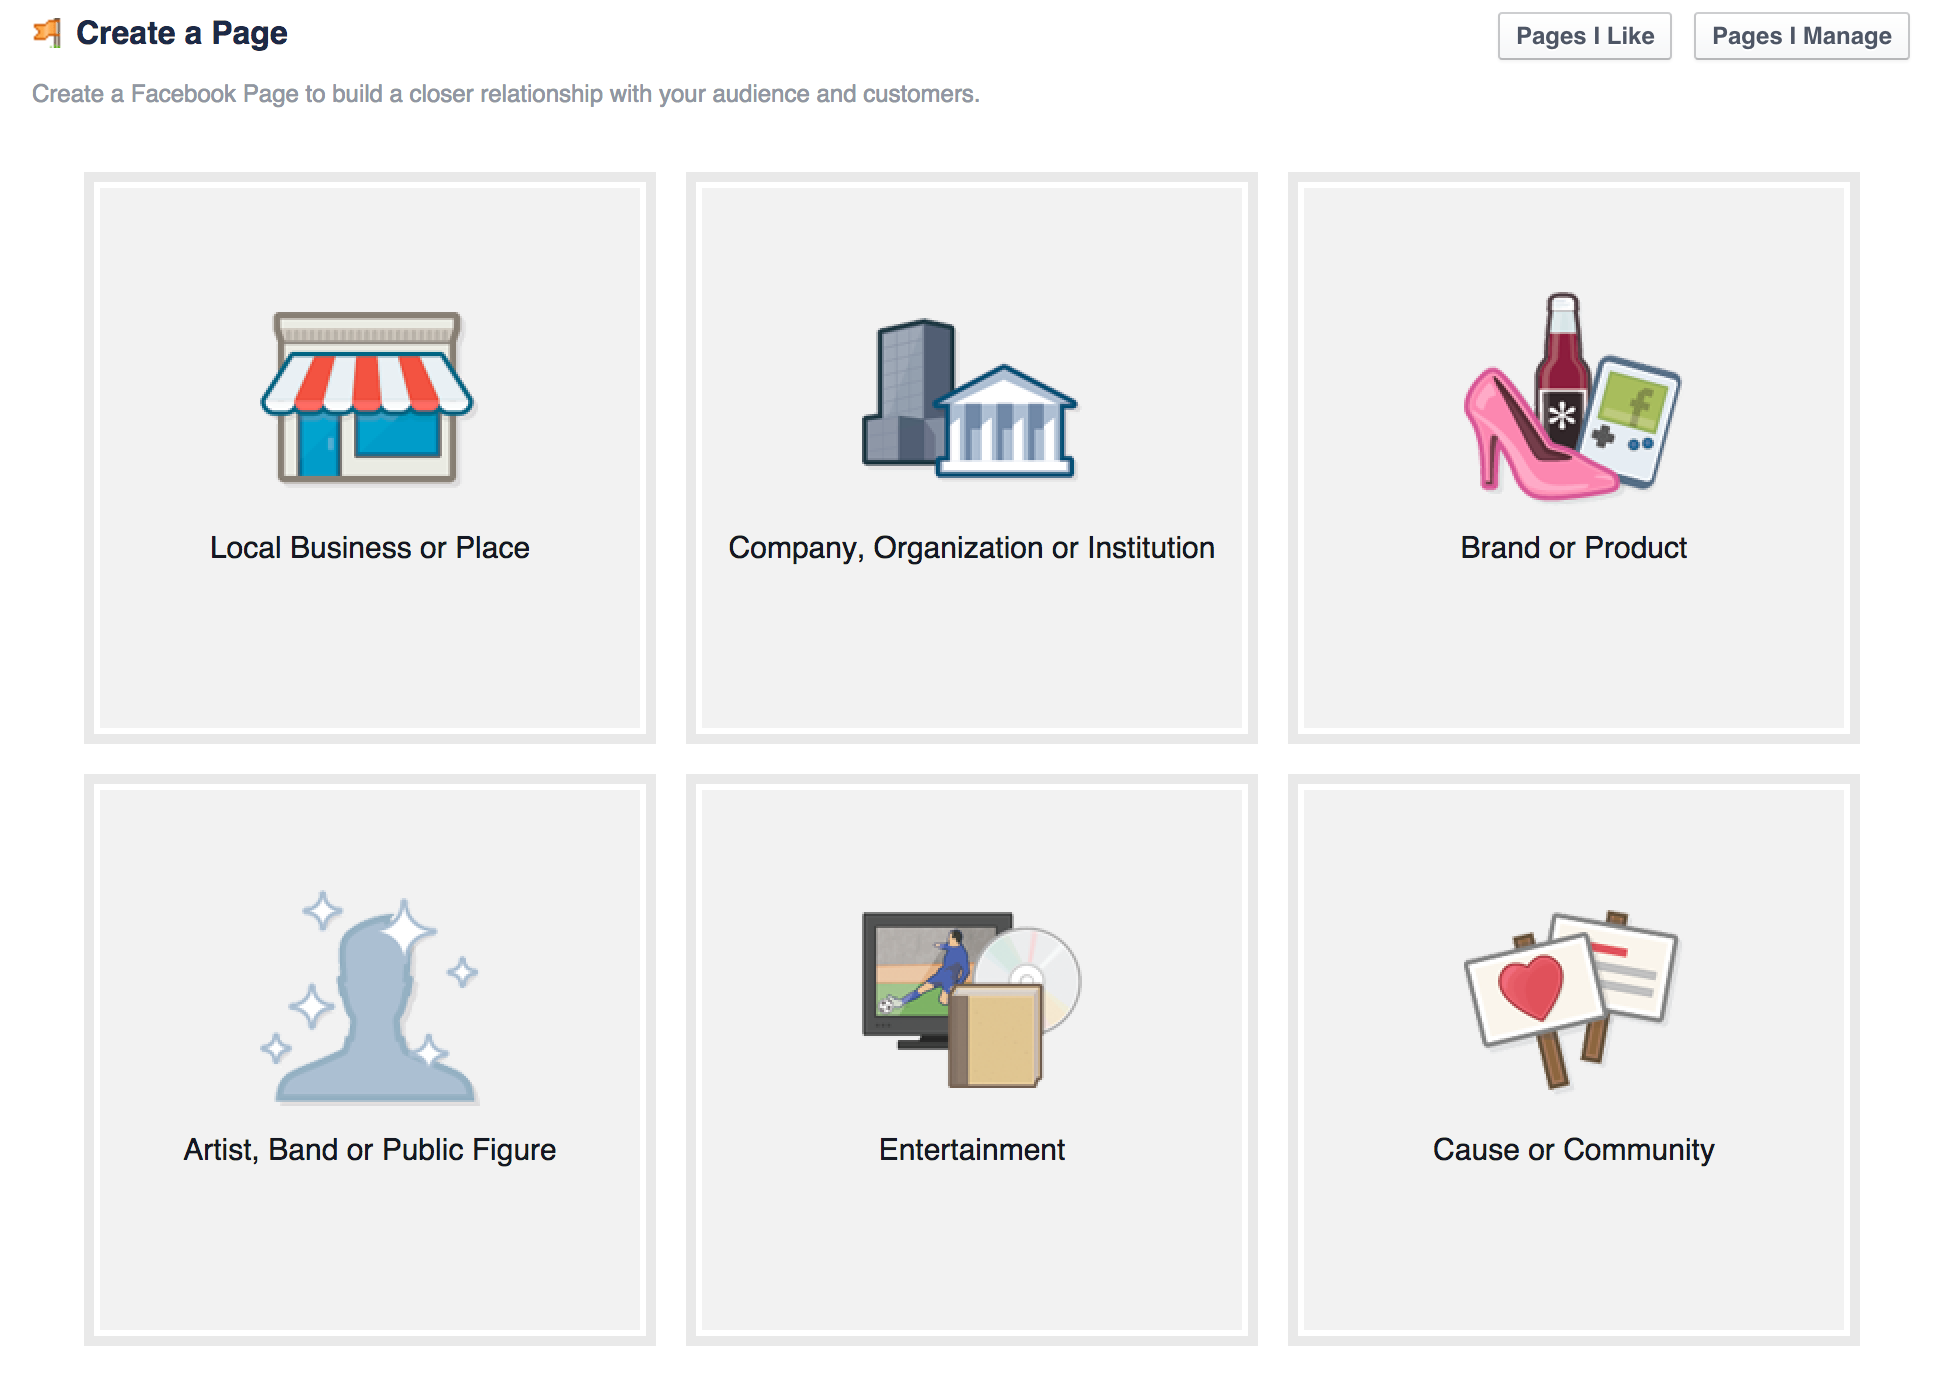
Once there, you’ll choose one of the following six categories for your page:
- Local business or place
- Company, organization, or institution
- Brand or product
- Artist, band, or public figure
- Entertainment
- Cause or community
Keep in mind that you can change the category and name later on if needed.
Also, at this stage, it might be helpful to know that a physical address figures prominently in the setup of a local business or place, and the actual Facebook page will appear differently as well.
About your page – You get 155 characters to describe your page. This description appears prominently near the top of your Facebook page on both desktop and mobile. Be as descriptive and helpful as possible.
URL – The web address for your store, company, or brand.
Facebook URL / username – You may have the option to choose a custom vanity URL for your page, i.e. facebook.com/yourbrandname.
(In some cases, Facebook will ask that you reach 25 fans first before you can unlock a custom Facebook URL.)
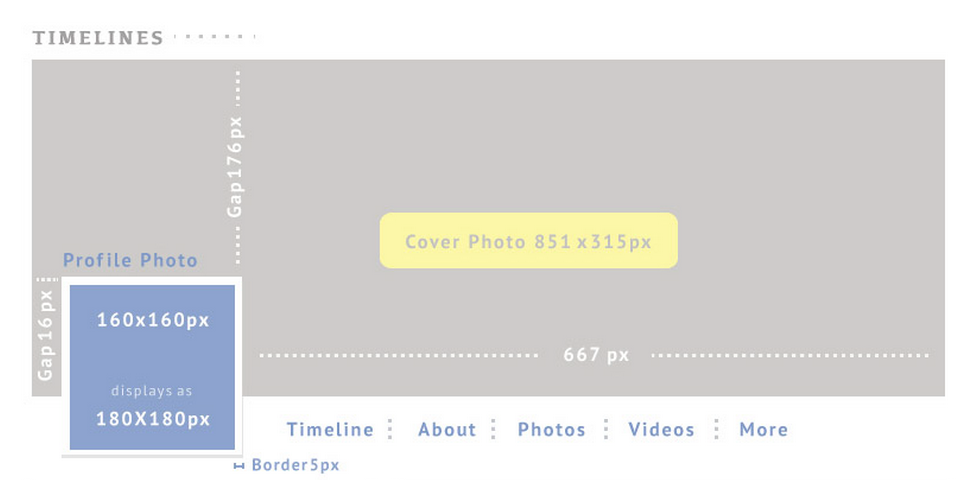
Profile picture – Upload a main profile picture/icon for your page. This photo will appear as your icon every time you comment on a post or publish in a news feed. Square dimensions are best. Facebook will force rectangular photos to be cropped to squares.
Profile pictures should be at least 180 pixels wide by 180 pixels tall. Here is a full list of the sizes that Facebook uses for your profile picture in various places around the site:
- The main profile image on your page – 160 x 160
- In a news feed – 100 x 100
- In your timeline – 86 x 86
- Next to comments – 43 x 43
The final two steps in the setup process include adding your page to your main Facebook menu (so you can access it quickly and easy each time you log in) and setting up a Facebook ad to promote your new page. These options can be skipped for now.
Step 2: Create a cover image in a snap (no designer required!)
By this point your page is live for all the world to visit. Let’s see if we can make it look even snazzier.
First thing, add a cover photo. The cover photo appears across the top of your page and is a great opportunity to deliver a visual element that supports your branding, draws attention, or elicits emotion from your visitors.
The dimensions for your cover image should be a minimum of 851 pixels wide by 315 pixels tall.
Step 3: Fill out your profile completely
Next, you can fill out your profile even more by adding information to your Page Info section. To access this section, click on Settings in the top menu bar on your page, then click Page Info.
Your name and category will be filled in already. Some of the most helpful bits of information to add next might be:
Start Info – You can choose when your company or product was founded, created, started, or launched. This information will appear on the history timeline to the right of your page’s feed and as an update at the very bottom of your main feed.
Address – Enter this if you want people to be able to check in via Facebook when they’re near your place.
Long description & Mission – Add additional details that explain your business or brand even further. This is a great way to go beyond the 155 character description that appears on the main page.
Phone number / Email address – Add additional contact information.
Step 4: Add collaborators to your page
If you plan on sharing your Facebook marketing duties with a team, you’ll want to grant access for various folks and various roles.
Here are the roles that you can choose from:
Admin – Complete and total access to everything (you are an admin by default)
Editor – Can edit the Page, send messages and post as the Page, create ads, see which admin created a post or comment, and view insights.
Moderator – Can respond to and delete comments on the Page, send messages as the Page, see which admin created a post or comment, create ads, and view insights.
Advertiser – Can see which admin created a post or comment, create ads and view insights.
Analyst – Can see which admin created a post or comment and view insights.
To add collaborators, go to your page settings and the “Page Roles” section. You can type in the name of any Facebook friend or person who has liked your page. Alternately, you can type in an email address associated with a Facebook account.
Step 5: Publish your first post
Add content to your page by publishing a post—a status update, a link, a photo, a video, an event, or a milestone. New, fresh content on your page will make it look all the more enticing once new visitors come over to check it out.
Keep in mind that visual content does exceedingly well on Facebook.
Facebook posts with photos receive 37 percent more engagement than those without photos.
What to post and when to post it
In general, there are three main types of posts you’re likely to publish on your Facebook feed:
- Photo/video
- Text update
- Links
As mentioned above, posts with photos garner 37 percent more engagement than posts without photos.
Definitely make visual content a huge part of your Facebook strategy.
As far as the frequency with which to post, Facebook’s algorithm changes have made research into the topic rather difficult. The consensus seems to be to publish more often. An Edgerank Checker study posted on the Moz blog determined that one way to counteract algorithm changes might be to publish more frequently—as often as you have fresh, compelling content to share.
Even more tips – What would you recommend?
I came across so many great Facebook page tips while researching this article. I couldn’t fit them all in! Here are just a couple more that slipped through:
- Reply to all comments with either a response or a Like.
- Tag other people and pages—especially your community members—in your posts.
- Consider adding your first name as a signature to the posts you write.
- Repost the evergreen content from your blog, regardless of the original date of publication.
If you want to hear what I have to say in 140 characters or less, please follow me on Twitter at http://twitter.com/erikpenn.